
Use the Content page to organize articles, open them for editing, and manage your help centre’s appearance and support settings from one place.
Step by step
- Open Content from your project navigation.
- Choose the tab you need:
- Articles for your article tree and inline editor
- Appearance for help centre appearance and navigation settings
- Domain & support for address and support settings
The selected tab stays in the URL, so Appearance uses
?tab=appearance, Domain & support uses?tab=domain, and Articles is the default.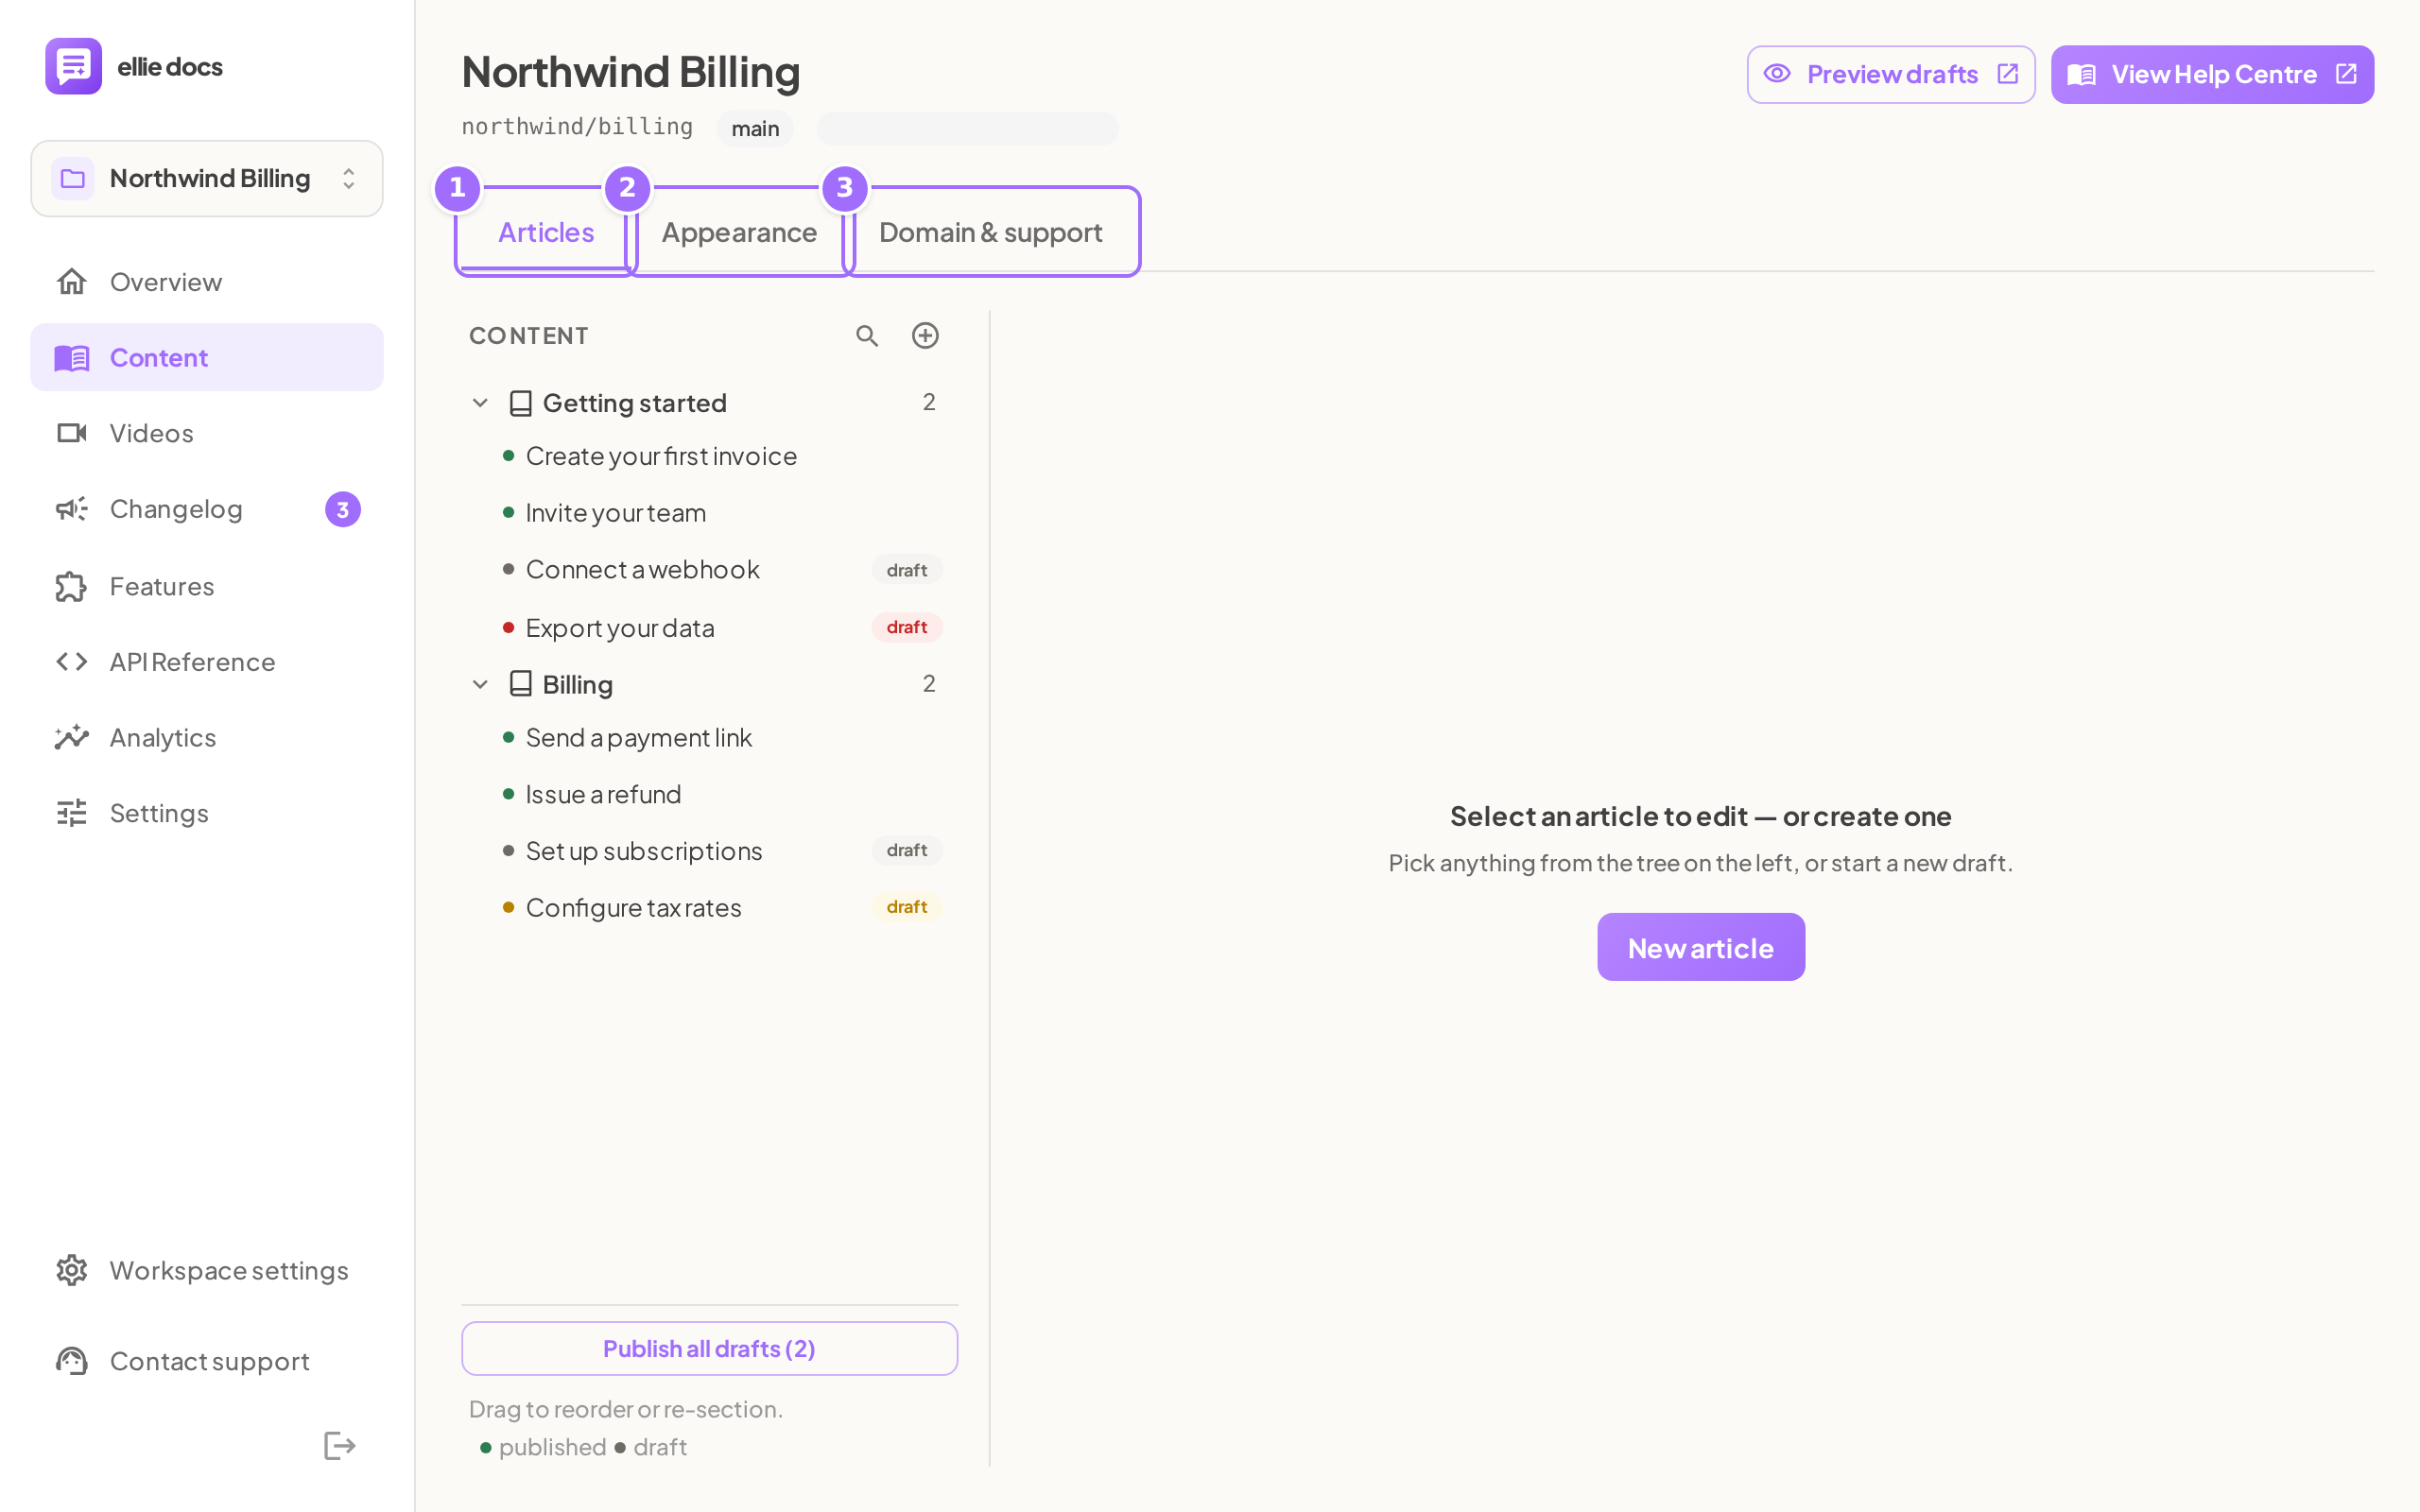
- Use Articles when you want to work on article structure and content. The left side is the CONTENT tree, and the right side is the editor pane. There is no separate editor page.
- Click any article in the CONTENT tree to open it in the right-hand editor pane.
- If no article is selected, click New article to start a draft.
- In the New article dialog, enter a Title.
- Click Create to create the draft and open it in the editor.


- To find an article faster, click Filter articles and search by title. The filter matches article titles only.
- To create a top-level collection, click Create section.
- In New collection, enter a Name and choose an icon. The first icon option is Auto icon.
- Click Save to create the collection.
- Hover over a collection row when you need collection controls:
- Move up
- Move down
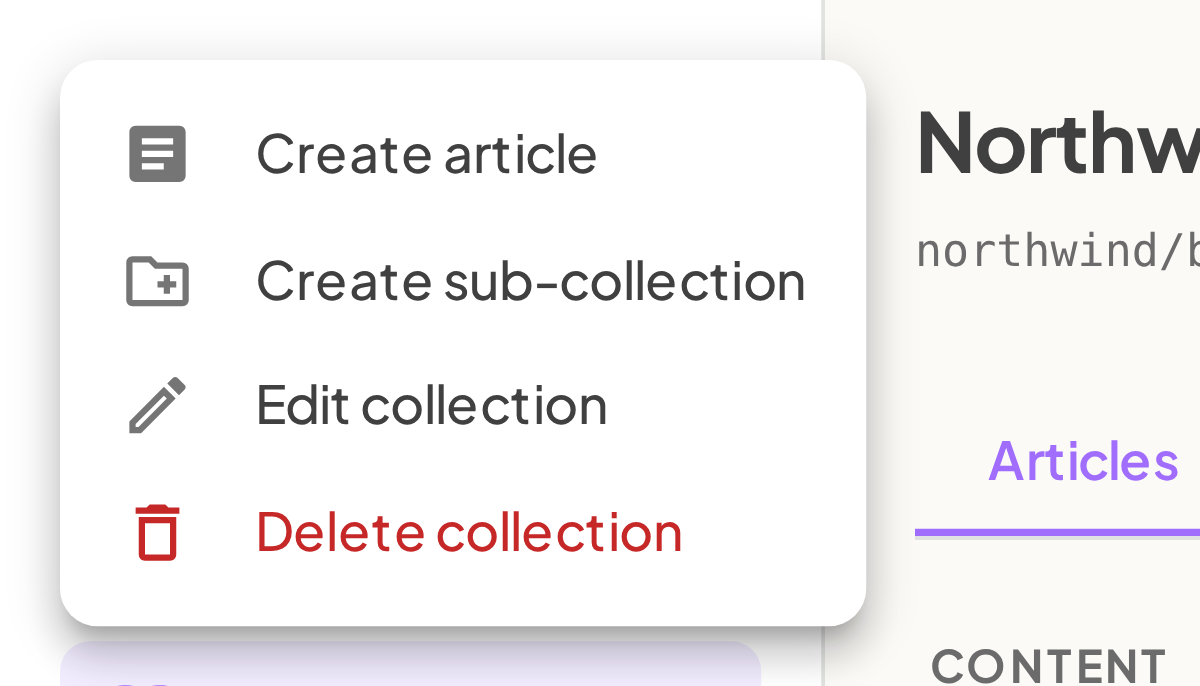
- Collection actions
- Use Collection actions when you want to manage a collection:
- Create article
- Create sub-collection
- Edit collection
- Delete collection
- Use the number on each collection row to check how many published articles it contains. Hover over that number to see the tooltip "<n> published".
- Open Appearance when you want to manage your help centre’s appearance and navigation.
- Open Domain & support when you want to manage your help centre address and support settings.

Good to know
What happens when I create a new article? A new article starts as a draft with an empty body, and you are taken straight into the editor. Its web address is generated from the title. If that address is already taken, Ellie adds -2, -3, and so on. api and changelog cannot be used as article addresses.
How does article filtering work? The filter is case-insensitive and matches article titles by substring. Collections stay visible only when they or one of their sub-collections contains a matching article. Closing the filter clears it.
Can I nest collections as deeply as I want? Yes. Collections can nest to any depth. Create sub-collection stops appearing once a collection is six levels deep or more, but that is only a soft guard.
What happens if I delete a collection? If the collection is empty, it is deleted immediately. If it contains articles, those articles move to Unfiled and stay published. A collection with sub-collections cannot be deleted until you move or delete those sub-collections first.
How are articles shown in the tree? Each article row shows a status dot and title. Published articles use a green dot. Draft articles use a grey dot and also show a draft chip. The legend at the bottom of the tree reads published and draft.