
Connect Claude, Claude Code, Cursor, ChatGPT, or another MCP client to Ellie Docs so you can ask questions, draft and edit articles, reorganise collections, review suggestions, and publish from your AI tool. New content always starts as a draft, and anything that changes your live help centre asks first.
Step by step
Start in Settings → AI tools. At the top of the setup card, copy the Server URL.

Claude
- In Claude, open Settings → Connectors.
- Choose Add custom connector.
- Name it Ellie Docs.
- Paste the Server URL from Ellie Docs.
- Click Connect.
- If prompted, sign in and choose what Claude may do.
- Try asking:
Show me my Ellie Docs article about invites.
Claude Code
- Run this command in your terminal, replacing YOUR_SERVER_URL with the Server URL from Ellie Docs:
claude mcp add --transport http ellie-docs YOUR_SERVER_URL - In Claude Code, run /mcp.
- Pick ellie-docs.
- Choose Authenticate.
- Approve the connection on the Ellie Docs consent page that opens in your browser.
Cursor
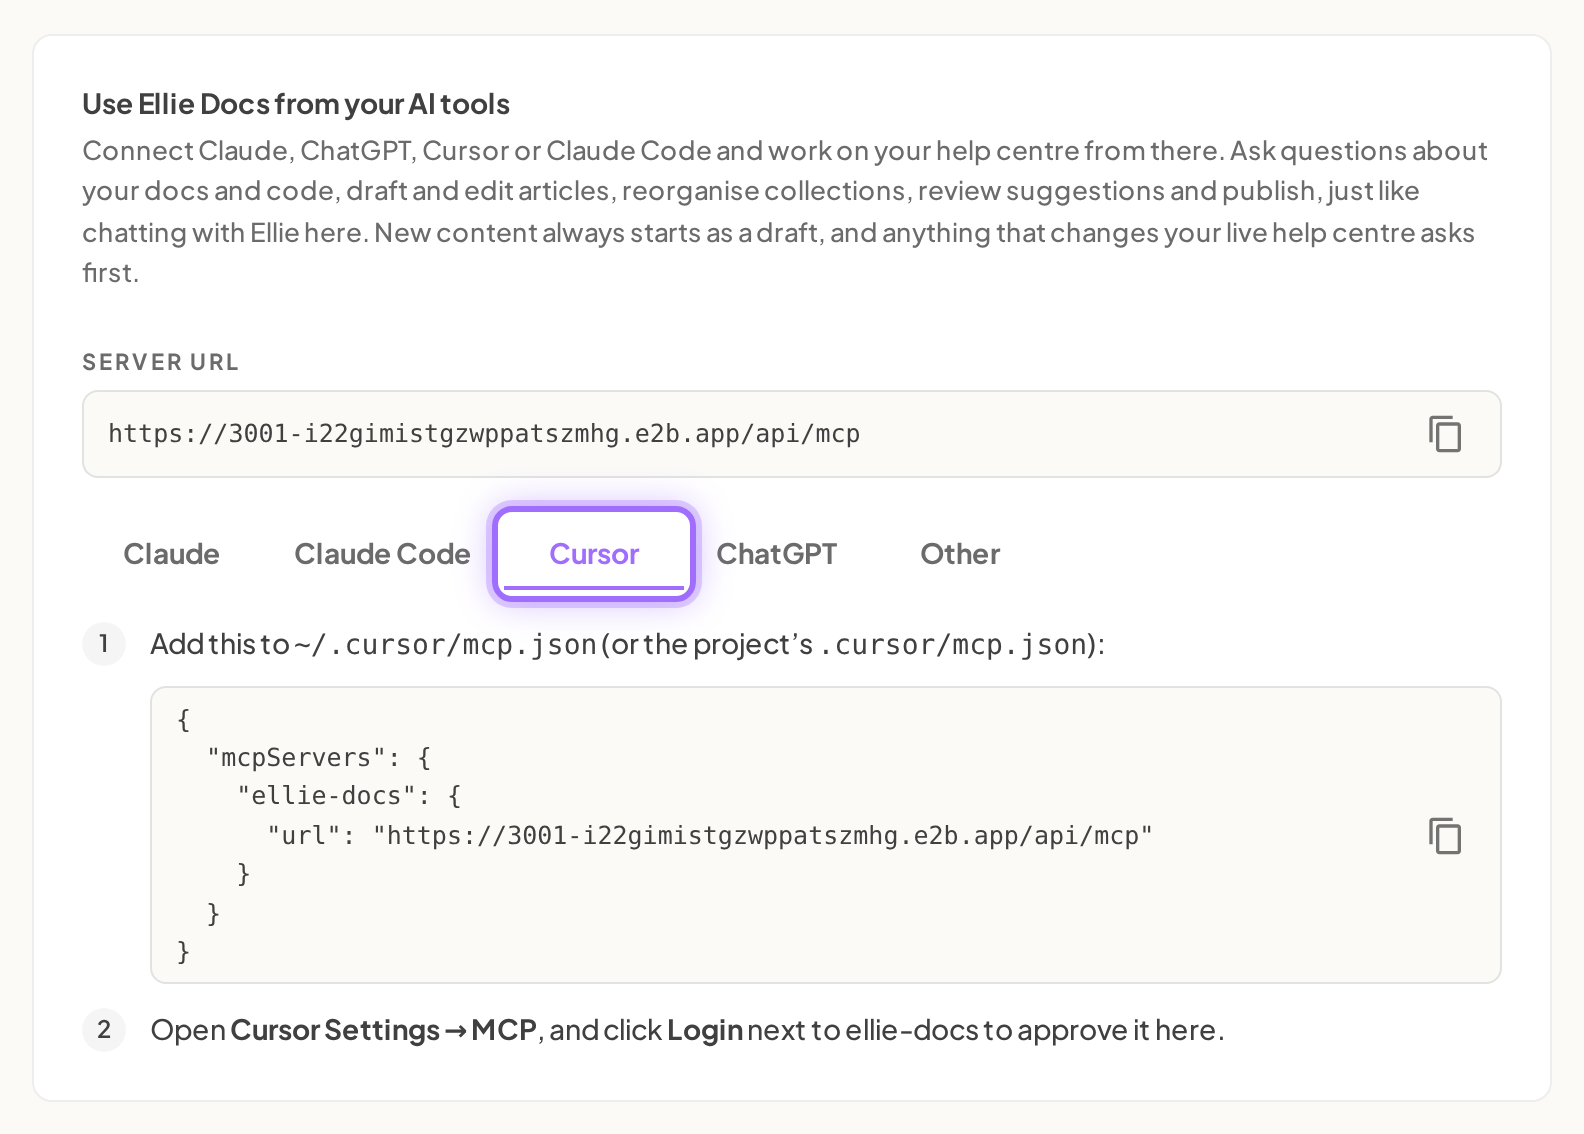
- Add this to
~/.cursor/mcp.json, replacing YOUR_SERVER_URL with the Server URL from Ellie Docs:{"mcpServers":{"ellie-docs":{"url":"YOUR_SERVER_URL"}}} - In Cursor, open Settings → MCP.
- Next to ellie-docs, click Login.
- Approve the connection on the Ellie Docs consent page that opens.

ChatGPT
- In ChatGPT, turn on Settings → Apps & Connectors → Advanced → Developer mode.
- Choose Create.
- Paste the Server URL.
- Pick OAuth authentication.
- Approve the connection on the Ellie Docs page that opens.
Other
- If your AI tool supports MCP with OAuth, connect it using the Server URL.
- If it does not support OAuth, click create a content API key.
- In API keys, create a key with one of these access levels:
- Read only
- Read and draft
- Full content access
- Use that key as a bearer token in your AI tool.
For step-by-step instructions on creating a key, choosing an access level and revoking it, see Create and use API keys.
Approve the consent page
When your AI tool starts sign-in, Ellie Docs opens a consent page titled Connect followed by the app name and to Ellie Docs.
- Review the app name, workspace, and account shown on the page.
- Choose the access level you want to grant.
- Click Allow followed by the app name (for example Allow Claude) to approve the connection.
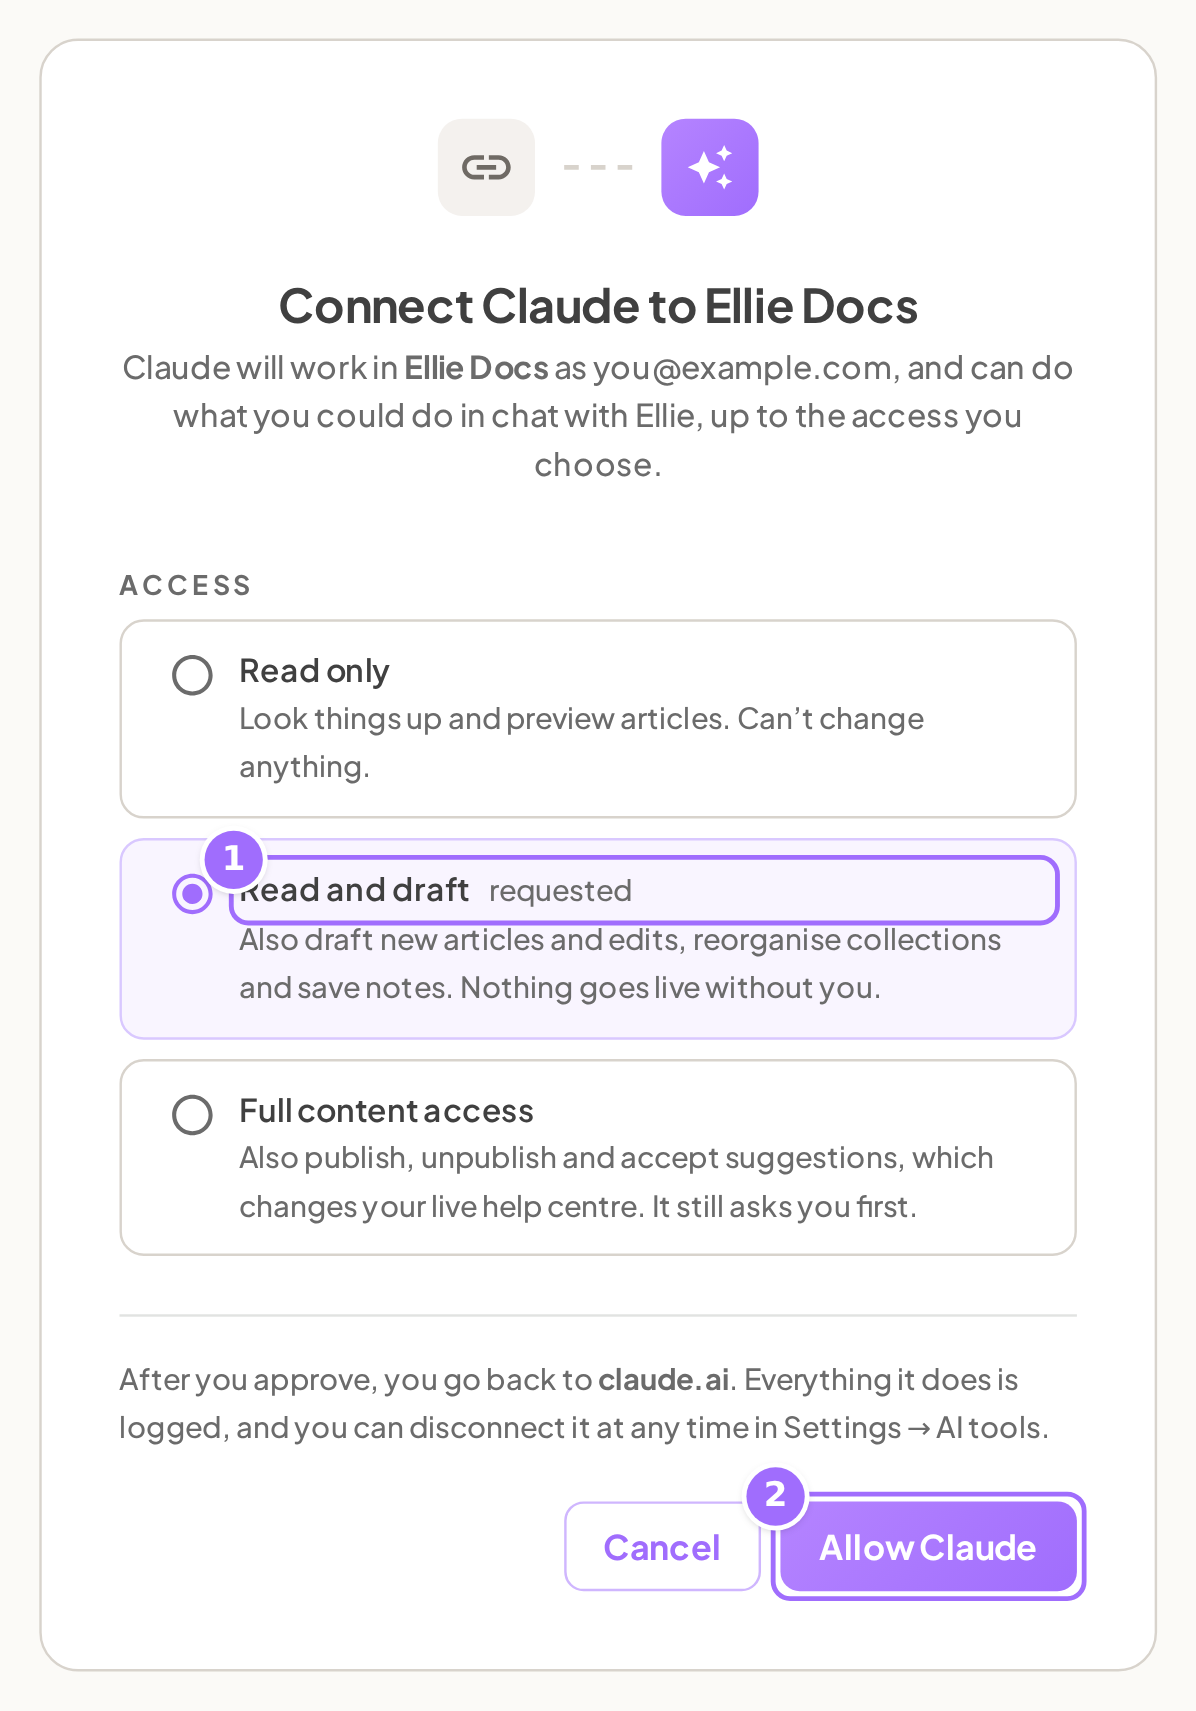

While approval is being completed, the button changes to Connecting….
If you do not want to grant access, click Cancel.
If the request is no longer valid, the page shows: This connection request has expired — start again from your AI tool.
Access levels
Choose the lowest level the tool needs.
- Read only
Look things up and preview articles. Can’t change anything.
- Read and draft
Also draft new articles and edits, reorganise collections and save notes. Nothing goes live without you.
- Full content access
Also publish, unpublish and accept suggestions, which changes your live help centre. It still asks you first.
What each level allows
- Read only includes read-only tools and previews.
- Read and draft also allows drafts, edits as suggestions, structure changes, and knowledge notes.
- Full content access also allows actions that change the live help centre.
Each level includes the permissions below it.
Manage connected apps
In Settings → AI tools, use Connected apps to review and remove access.
The table shows:
- App
- Access
- Approved by
- Last used
If nothing is connected yet, you’ll see No AI tools connected yet.
To remove access, click Disconnect next to the app. The connection is cut off immediately.
Below that, Recent activity shows the last 20 actions taken by connected AI tools.

Good to know
What happens if I’m not signed in when I approve a connection? You’ll be sent to sign in first, then returned to the consent page to finish approval.
What if my AI tool hits a limit? A connection can make about 120 tool calls per minute. If it goes over that, the tool returns: Rate limit reached — wait a minute before calling more tools.
Do draft actions show up anywhere in Ellie Docs? Yes. Every action an AI tool takes is logged in Recent activity. Drafts it schedules also appear in the External agent (MCP) chat thread.
Can a draft-level connection publish by mistake? No. Read and draft does not change live content on its own; the exception is editing an article’s meta description from an AI tool — meta description edits are applied immediately, and making that edit to a published article requires Full content access. Publishing, unpublishing, accepting a suggestion into a published article, and editing the meta description of a published article require Full content access.